Docker with Nx
Sat, 29 Mar 2025 12:10:43 GMT
I have three main applications in my monorepo: One for the server, one for the client, and one for the admin panel. I will show you how to dockerize the server application, but the same steps apply to the client and admin applications.
NestJs server application
Build
Dockerize your application means copying your application files into a Docker image, and then running the image in a container.
Normally, you would build your application first, and then copy the build files into the Docker image. Why build and not just include all your files as is? That's outside the scope of this blog, but basically building your application will help you to reduce the size of the Docker image.
So the first 2 tasks for you are:
- Build your application.
- Locate the build files (so that you can tell Docker where to find them later on).
If you use use Nx generators, chances are the build target has been set up for you.
Indeed, opening Nx Console extension in my VSC shows that the build target is already there.
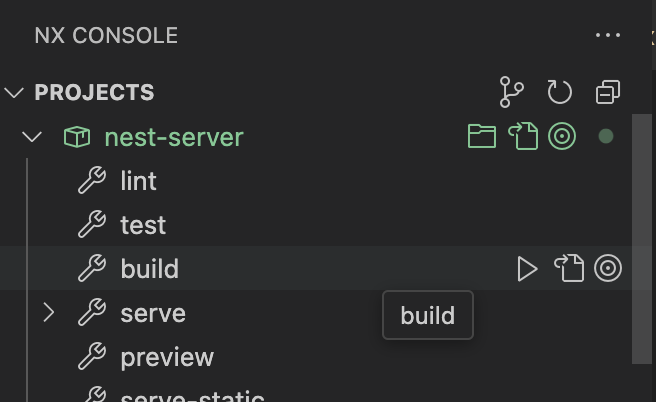
Wanna find the configuration for this build target? Click on the "Show Project Configuration" button (in the image above, it's the button to the right of the Play button).
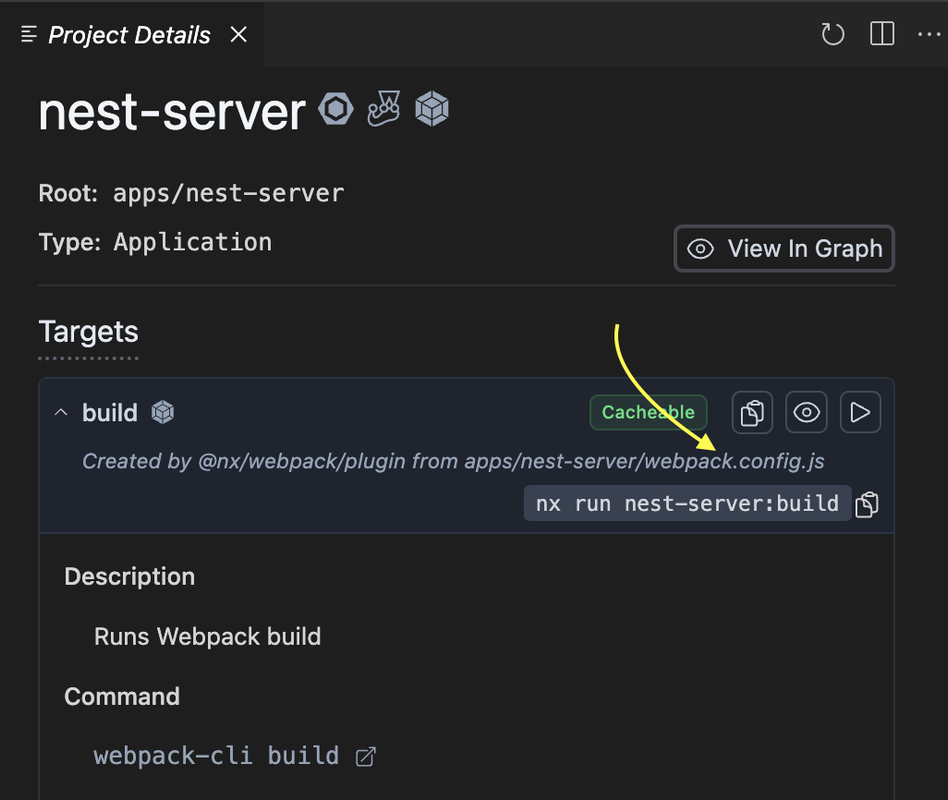
This tells me the build target is inferred from nest-server/webpack.config.js. Let's open it up.
There's a lot of information here, but only one is important to us right now: the location of the build files will be "../../dist/apps/nest-server".
Run the build command and verify that the build files are indeed generated in the dist/apps/nest-server directory.
Dockerfile
We will use a Dockerfile to automate our Docker image generation process. We will use @nx/node to generate our Dockerfile. @nx/node is previously named @nrwl/node, but changed its name following Nx's rescope decision.
To generate a Docker file, run:
Here, I pass in two arguments, feel free to swap them out:
- project: The name of the project you want to generate the Docker file for. For example, since I specify the project to be nest-server, the Docker file will be generated in the apps/nest-server directory.
- outputPath: The location of the build files relative to the project directory. That is, the path in the Build section above.
More on this command here.
After you've run the above command, a Dockerfile will be generated at the root of your project. In addition, the project.json file will be updated with the following target:
Dependencies
Go ahead and execute the target:
You will notice that it fails at the dependencies installation step. In my case, the exact command that failed is:
A little inspection into the error log shows that it can't find the package.json file. And that makes sense, because all the projects inside our monorepo shares 1 package.json file at the root of the workspace. That is, outside of our nest_sever project. And thus, when we copy files from outputPath to our Docker image above, there's no package.json inside!
So now, our tasks are:
- Find a way to include a package.json into our Docker image.
- This package.json must be a shorter version of our monorepo package.json, since we only want to include the dependencies that nest-server uses.
Luckily, webpack has a feature that allows us to generate a package.json file for our project. This is done by setting the generatePackageJson property to true in the webpack.config.js file.
Now, rebuild the project:
Verify that the package.json file is generated in the dist/apps/nest-server directory.
Now, try to run the Docker build command again:
This time, it should work. The Docker image is built successfully.
Now, let's try running the Docker image. I change my working directory to apps/nest-server, and run this command:
An unexpected error occurs:
What happens?
Well, if you inspected the generated package.json inside the dist/apps/nest-server directory, you will see that the pg package is not included in the dependencies section. It is included in the package.json file at the root of the workspace though ☹️. Stupid webpack.
So, we need to manually install _pg. How to do that? Well, let's open our Dockerfile and add an installation step. It will look like this (notice the install additional deps step):
Now, rerun the docker-build target and then run the Docker image again. This time, it should work.
One side note: If you're using Sequelize and use you environment variables to set up the database connection, and you're developing locally (i.e the database is on local machine), you need to change the database host from "localhost" to "host.docker.internal". This is because the Docker container is running in a different network than your local machine. So, "localhost" inside the container refers to the container itself, not your local machine.